Sunday, February 20, 2022

Uniko 10th Birthday Celebrations...Flower Power Stencils~Friendship and Birthday

Hello,

I'm delighted to be joining Bev and her Brand Ambassadors to celebrate Uniko's 10th Birthday.


As a Uniko Alumni, I was asked to select one of my favourite cards to CASE with new products. I so enjoyed my trip down memory lane in reviewing, and finally selecting, not one, but two cards, to update.  

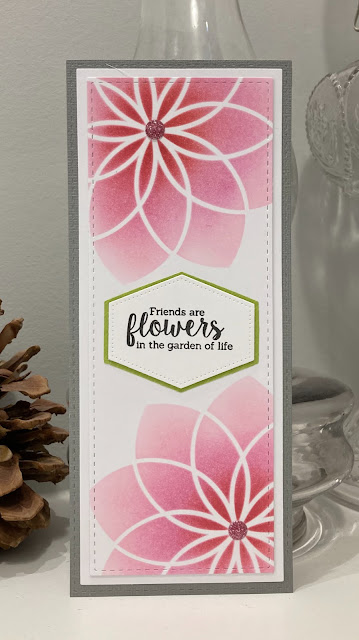
For my first card, I selected a CAS little number I made in May, 2018, using Flower Power #8 stamps. The entire range of Flower Power stamps and dies are an absolute joy to play with; it's amazing how these small blooms can have such impact, whether they appear solo or in groups.
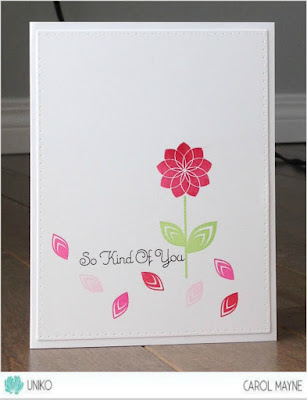

My updated version is a slimline card, featuring Stencil - Flower Power #8; this stencil sees the little stamp image magnified to be a stunning focal point! From the original card, I kept the red-to-pink palette from the blooms, using a combination of dye + distress inks. The green from the leaves appears in the slim frame of the sentiment, from Originally Organic, one of my all-time favourite collections and one of my first purchases from Uniko years ago.

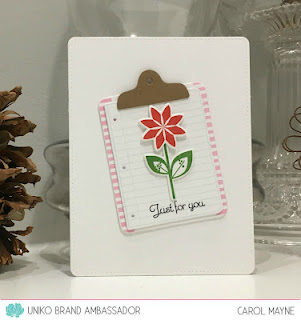
Inspiration for my second card came from this clipboard card, from March 2020, where Flower Power #1 is the star of the stage.

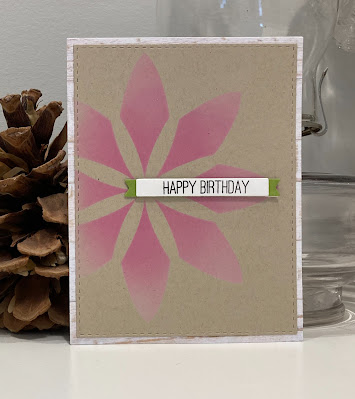
For my updated version, I used Stencil - Flower Power #1 which, like the stencil above, is a scaled-up version of the stamp. I translated the kraft from the clipboard clip into a background panel, the pink stripes into a woodgrain base panel as well as the colour-of-choice for the flower, and the green leaves into a backing strip for the sentiment, from Birthday Sentiments. This is the first time I've used distress oxide inks on kraft and I'm delighted with the results. 

When I was invited to join Uniko in September 2017, I was beyond ecstatic; a dream come true! I still marvel at the awesome opportunity I was given and will always LOVE the Uniko family!  

Thank you, Bev and the rest of the team, for inviting me to join in this milestone celebration! 
Happy 10th Birthday and wishes for 10 x 10 more birthday celebrations to come!

Thank you for dropping by!


Friday, February 18, 2022

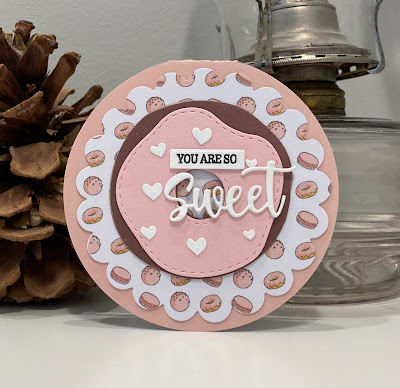
Inkspirational Challenge #259~Technique Challenge - Shaped Cards - Sweet Donut Circle

Hello,

Welcome to Inkspirational Challenge #259, where we're launching a new challenge to the current word, photo and designer's choice line up: TECHNIQUE Challenge. Every fourth rotation, we'll invite you to share a 'technique' with us, and to mark the debut of the newcomer, we're going with something we hope you'll enjoy: SHAPED cards. Any shape works, except for squares or rectangles.  A chance to think outside of the 'box'! 

The team has created fabulous cards; if you'd like more inspiration, check out the Queen of Techniques, Jennifer McGuire. Her recent Fun Shaped Birthday and Rocking Pendulum cards/videos are filled with wonderful ideas.

I've gone with a simple circle card, mainly because my new MCT dies arrived! I paired my strawberry glazed chocolate donut and white chocolate hearts sprinkles with....yep, donut patterned paper! Dozens of donuts on this card! The inside sentiment reads: "Thanks a hole bunch." I've already made two cards with this set (see my previous post) and plenty of ideas for more. We could all use a touch of sweetness these days! 


Please check out my teammates' delightful creations, then play along with us!


Thank you for dropping by!


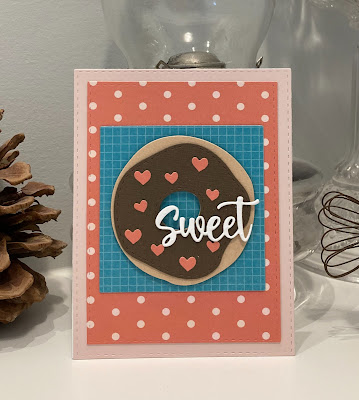
Just Us Girls Challenge #620~Color Week - Teal, Orange and Dark Brown...Sweet Donut Card

Hello,

Welcome to Just Us Girls Challenge #620, where our lovely hostess, Ina, has selected Teal, Orange and Dark Brown as this week's colour inspirations. 


I had difficulty with this colour combination for a VERY good reason: too many ideas! My first inklings were to choose something fall-themed or use one of my always reliable turnabouts, but then...my new order from MCT arrived and the decision was made! Donut! A search through my patterned paper yielded this random orange polka-dot piece, which I paired with a teal (although it looks more blue in the photo) grid paper from Photoplay and a background panel of light orange. The donut is, obviously, decorated with decadent dark chocolate icing and creamsicle flavoured orange hearts! I left 'sweet' as the solo sentiment, so I can decide, down the road, what 'sweet' message I want to send.  This donut die set is fun...and you'll see it in action really soon (hint, my next post...).


Please check out the awe-mazing cards made by the design team, then bring your teal, orange and dark brown creations to the gallery!

Thank you for dropping by!


Wednesday, February 16, 2022

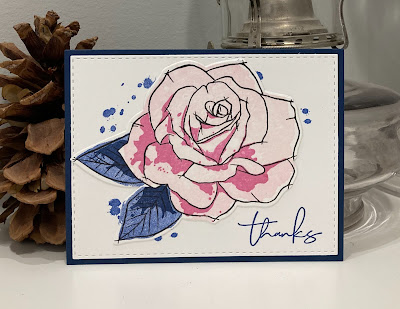
Color Hues Challenge #35~Navy and Pink...Painted Rose Thanks

Hello,

Welcome to Color Hues Challenge #35, where our lovely Kristie invites us to use hues of Navy and Pink for the next two weeks. Such a pretty combination...

A simple card - and a rare floral showcase from me - using the ever-so-lovely and ever-so-versatile (colour-wise) Painted Rose from Concord & 9th. This beautiful stamp and die did all the work; I just played!

 
Looking forward to how Navy and Pink inspire you!

This challenge will be open until February 28th @ 9AM!

The winners will be posted an hour before our next challenge goes live.
The overall winner will have the opportunity to be a 
future Guest Designer!


Thank you for dropping by!


Monday, February 14, 2022

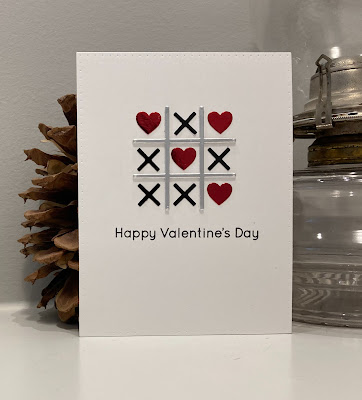
Perfectly CAS #24~February 2022 - Metallic...Tic-Tac-Toe Happy Valentine's Day

Hello,

Welcome to Perfectly CAS February 2022 Challenge, where we're inviting you to use metallics on your projects.


A simple, CAS card to wish you a Tic-Tac-Toe Happy Valentine's Day! Although it's difficult to see in the photo, all the die cuts are metallic; a combination of Sizzix and Tonic papers. The dies and stamps are from MFT.


Please be sure to pop by my teammates' blogs, leave them some love, then play along with us!
  • A friendly reminder: For this challenge, we're asking you to use one-third (aka: the rule of thirds) or less on your card designs, leaving plenty of scrumptious white space (two-thirds of your panel) to draw our eyes to to your focal image. Kylie has included an easy-to-follow explanation on the challenge blog here.


Thank you for dropping by!


Friday, February 11, 2022

Just Us Girls #619~Trend Week - Make your own stencil from a die or dies...Sending You Love (X, O and Hearts)

Hello,

Welcome to Just Us Girls Challenge #619, where our lovely hostess, Sue, invites us, as this week's trend, to make our own stencils from a die/dies. 

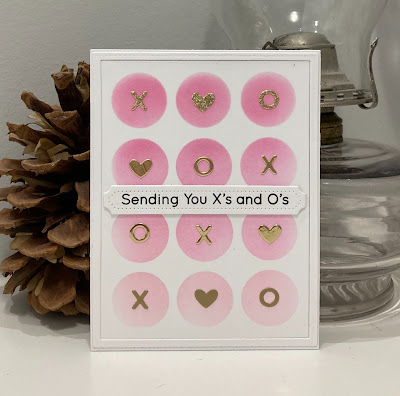
I used Studio Katia's Loop die for my stencil, which I cut from cardstock. The first card is the 'actual' stenciled version; the dots are filled with MFT X, O and heart dies cut from assorted gold glitter and mirror paper. Sentiment is also MFT.


Because the dots cut from a panel, I wound up with a second card. The apertures are filled with chipboard hearts and a sticker sentiment. Yayyyy for a twofer!


Looking forward to seeing your *Dies transformed into stencils*projects in the gallery!

Thank you for dropping by!


STAMPlorations CUTplorations Creative Cuts...Stylized *One Layer* Coffee-themed Cards

Hello, 

Welcome to my third instalment of projects featuring STAMPlorations CUTplorations Creative Cuts. As you know, Shery has a plethora of thin, cut-like-butter dies in her shop. Words, phrases, tags/frames, images, cutting plates...possibilities galore. If you enjoying playing with dies as much as I do (and I DO!), please be sure to check them out! 

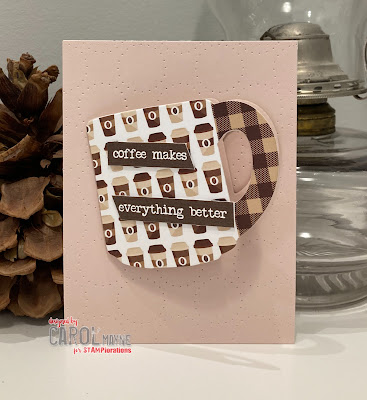
In the circles of card-making land that I visit frequently, I've seen a variety of cards that present a stylized version of a one-layer card; namely, a back panel (often reinforced with an additional die-cut layer) with a 'something' on the front that opens as a mini-card. Sort of like a *postcard with a pop-up* format. No need for a full card base, as the front image allows space for a message. So...I've decided to create a set of cards in this fashion, using the super cute solid coffee mug from the Zen Coffee Cup Layering Dies.

To create the mini cup cards, fold your paper and place the die just slightly outside the fold line. Run through your machine and voila: an adorable little mug shaped card. For the top piece, use the die as you would normally and adhere over the top of your little card. I've adhered the cup with foam tape, for dimension and for ease in opening.  

For three cards, I used the Coffee Backgrounds ATC ephemera as decoration. They fit the die well and add another layer of 'coffee' to the theme. 

Hopefully, photos will help you visualize the process. I had a blast making these! 

Card 1:


Inside:


Card 2


Inside


Card 3


Inside


Of course, I had to make a couple of seasonal versions: one Christmas and one Valentine's Day. I reached for papers/stickers from Simple Stories Feelin' Frosty  and Doodlebug's Lots of Love collections.

Card 4


Card 5


Hopefully, I've offered inspiration for designing small works-of-art with your CUTplorations dies and assorted STAMPlorations products!

Also sharing at:


Thank you for dropping by!